Azure Devops Pipeline
Pipeline
To create a pipeline that builds the .NET solution when it is triggered, please follow the following steps:
-
Login to Microsoft Azure Devops and select an existing organization or create a new one by clicking on Create new organization. For more info about organizations and how to create them Click here.
-
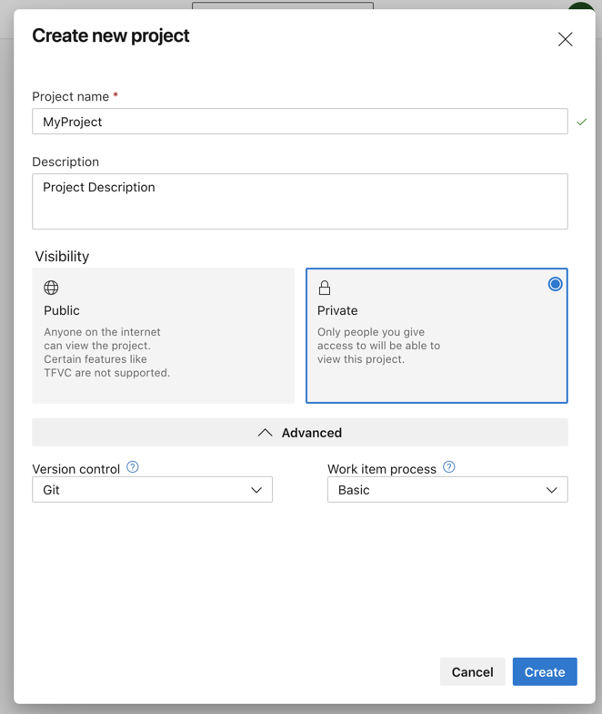
Open an existing GIT project or create a new one by following these steps:
- Click on New Project.
- Type a name and description for your project.
- Select the visibility of your project.
- Select the version control which can be GIT or TFS. This document will be based on GIT.
-
Navigate to your project and click on pipelines. Now, click on the “Create pipeline” button, then select where your code is. Github will be used in this example. Once you select where to get your code from, you’ll be asked to authorize that, then you will get a list of repositories that you have access to. Now select the repository that you want to create a pipeline for. I will be using an example dotNet application, which is publicly available by clicking here. Now a list will be shown to use one of the pipeline’s templates. We will be using ASP.NET as shown below:

-
Add the following two tasks at the end of the generated pipeline:
- A task to extract files, as the built files will be zipped, and the files need to be unzipped when creating releases to be able to push to cloud foundry.
- task: ExtractFiles@1 inputs: archiveFilePatterns: '$(build.artifactStagingDirectory)/*.zip' destinationFolder: '$(build.artifactStagingDirectory)/unzipped' overwriteExistingFiles: true- A task to publish the build artifacts; so they can be used by releases:
    - task: PublishBuildArtifacts@1
      displayName: 'Publish artifacts'
      inputs:
        PathtoPublish: $(build.artifactStagingDirectory)
        ArtifactName: 'TestApp'
Now the final pipeline file, should be something similar to:
# ASP.NET # Build and test ASP.NET projects. # Add steps that publish symbols, save build artifacts, deploy, and more: # https://docs.microsoft.com/azure/devops/pipelines/apps/aspnet/build-aspnet-4 trigger: - main pool: vmImage: 'windows-latest' variables: solution: '**/*.sln' buildPlatform: 'Any CPU' buildConfiguration: 'Release' steps: - task: NuGetToolInstaller@1 - task: NuGetCommand@2 inputs: restoreSolution: '$(solution)' - task: VSBuild@1 inputs: solution: '$(solution)' msbuildArgs: '/p:DeployOnBuild=true /p:WebPublishMethod=Package /p:PackageAsSingleFile=true /p:SkipInvalidConfigurations=true /p:PackageLocation="$(build.artifactStagingDirectory)"' platform: '$(buildPlatform)' configuration: '$(buildConfiguration)' - task: ExtractFiles@1 inputs: archiveFilePatterns: '$(build.artifactStagingDirectory)/*.zip' destinationFolder: '$(build.artifactStagingDirectory)/unzipped' # cleanDestinationFolder: true overwriteExistingFiles: true - task: PublishBuildArtifacts@1 displayName: 'Publish artifacts' inputs: PathtoPublish: $(build.artifactStagingDirectory) ArtifactName: '{YOUR_APP_NAME}' -
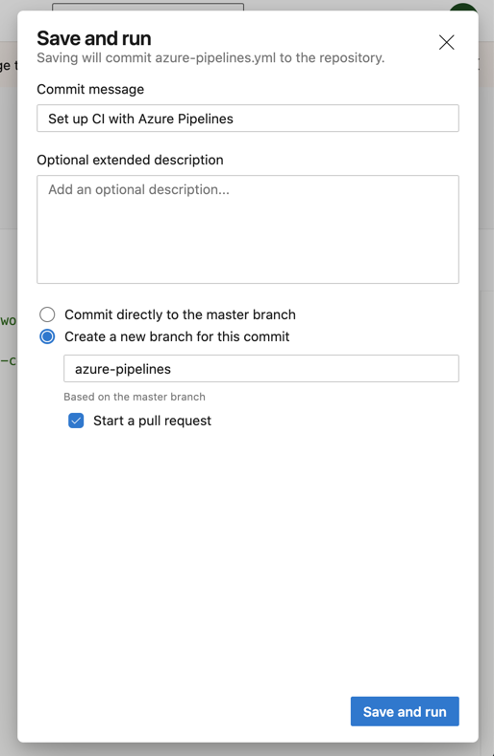
Click on save and run. This will add a commit to your repo, which will add a new file for the pipeline. You can commit directly to the master branch, or you can create a new branch for that commit. As a good practice, commit to a new branch, once you are sure that this is the pipeline you want, then you can create a pull request to the master branch.
-
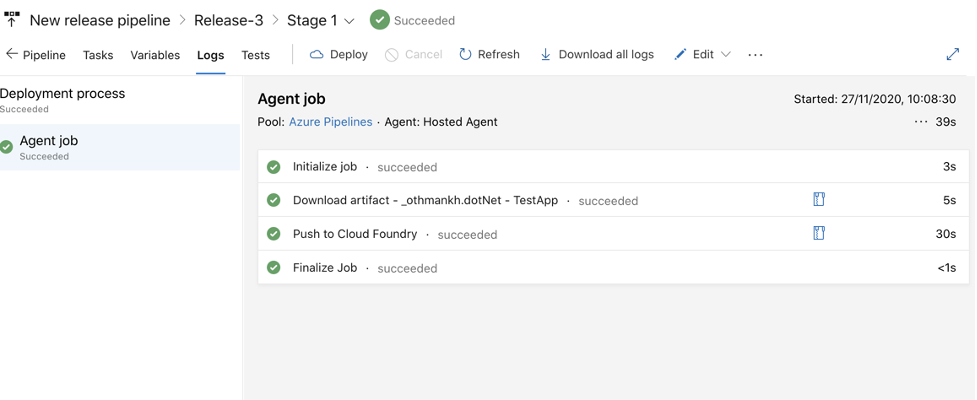
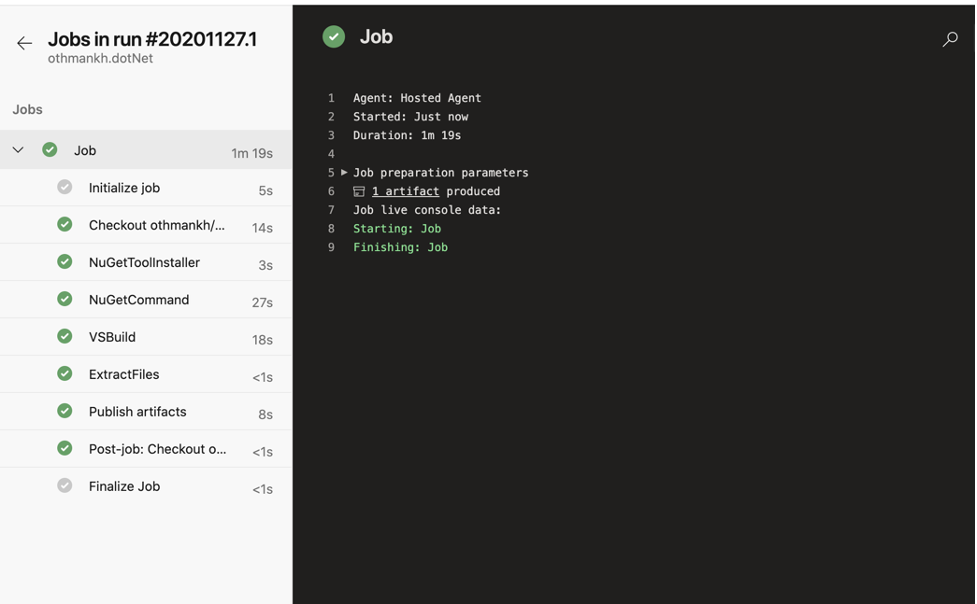
Now while the pipeline is running, you can click on jobs and track the progress of the pipeline, after the pipeline is done, you should be able to see an output similar to below.
-
Now, you should be having a running pipeline, which publishes the builds artifacts and can be used by the release.
Release
After building the application using the pipeline created in the previous section, this section will focus on pushing the built application to Cloud Foundry. To do so please follow the following steps:
-
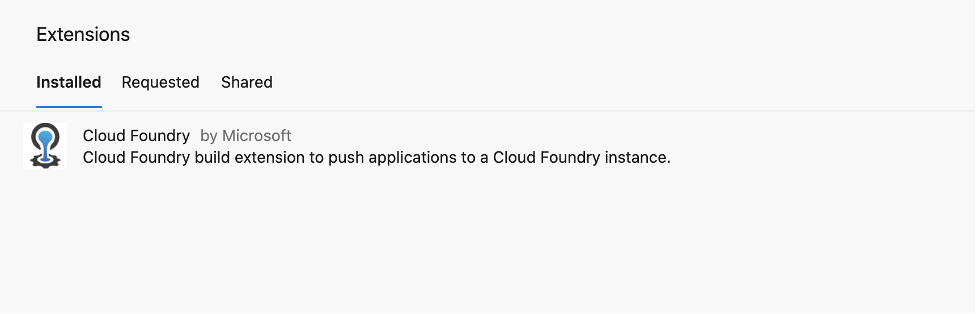
To be able to use cloud foundry, click on Browse Marketplace from the top menu as below
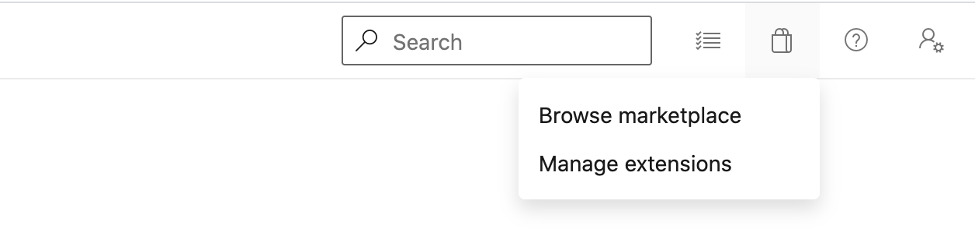
Search for cloud Foundry, then install it to your organization. Now, if you click on manage extensions, you should be able to see Cloud Foundry installed.
-
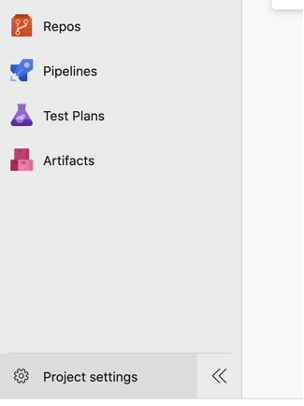
Create a cloud foundry connection by clicking on Project settings
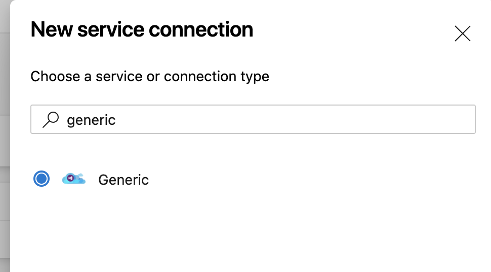
Click on Service connections in “Pipelines” then “New service connection”, select generic then click on Next.
Type your cloud foundry credentials, then click on “Save”. Now, you should be able to see a new service connection in your service connections list.

-
Go back to the project’s page, click on “pipelines” then “releases“in the left tasks panel. Then click on “New pipeline”. A window will popup to select a template, please select Empty job.
-
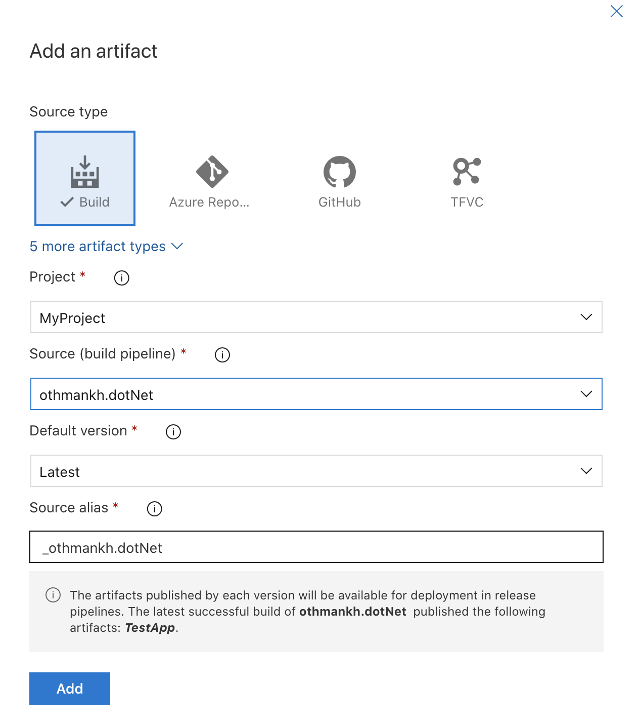
Click on “+ Add“artifacts, which will now refer to the build artifacts published by the pipeline created in the previous section. Now, select “Build” source type, and then choose the source, which should be the pipeline already created in the previous section. Then click add. See below image.
-
Click on Tasks under “Stage 1”. If the stage is not already there, you can create one by clicking on "+ Add” Stages. Then click on the “+“next to the agent job, search for Cloud Foundry and select “Push your applications to Cloud Foundry“as shown below.

-
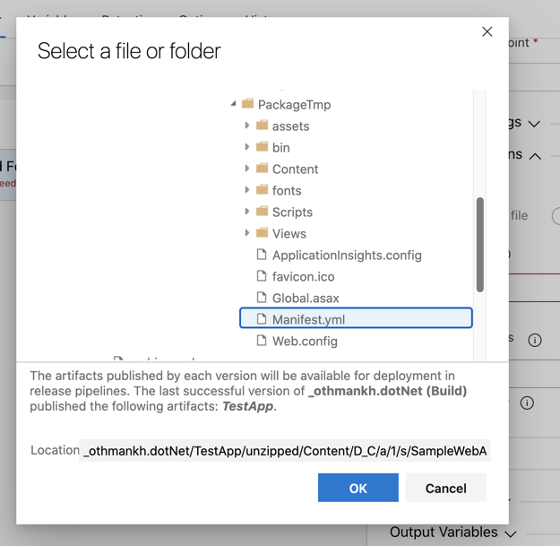
Now click on the “Push to Cloud Foundry“task to configure it. Select the cloud foundry endpoint, which is the generic service connection created in step 2. Then, under deployment options, select the manifest file of your project by clicking on the “…”, and then traverse the folders until you find your manifest:
-
Under connection settings, type your org and space.
-
Under Advanced, you need to select the working directory, which is the same path of Manifest.yml but without the Manifest.yml at the end of your path.
-
Finally, create a release and run it. Now, you should be able to access your application on TAS.